
The RELX Essential is a popular pod vape device known for its simplicity, sleek design, and smooth performance. However, like any electronic device, it can sometimes develop issues such as not producing vapor, not charging, leaking, or poor connectivity with pods. The good news is that most of these problems can be fixed easily at home without professional help.
This guide will walk you through the most common RELX Essential problems and how to fix them step by step.
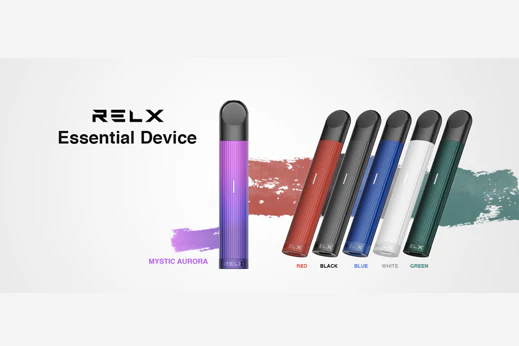
Understanding the RELX Essential Device
Before fixing any issue, it’s important to understand how the device works. The RELX Essential consists of:
- A battery unit
- Magnetic pod connection
- Charging port (usually USB Type-C)
- LED indicator
The device works by detecting airflow when you inhale. It heats the e-liquid inside the pod and produces vapor automatically. Since it has no buttons, most problems are related to battery, connection, or pod issues.
1. Device Not Producing Vapor
Possible Causes:
- Dead battery
- Pod not connected properly
- Dirty contact points
- Faulty pod
Fix:
Step 1: Check Battery Level
If the device is not producing vapor, the first thing to check is whether the battery is charged. Plug it into a charger and wait for at least 30–60 minutes.
Step 2: Reinsert the Pod
Remove the pod and insert it again firmly. Make sure it clicks into place properly.
Step 3: Clean the Contacts
Sometimes dust or e-liquid residue blocks the connection between the pod and the device.
- Remove the pod
- Use a dry cotton swab or tissue
- Gently clean the metal contacts inside the device
Step 4: Try a Different Pod
If the problem continues, the pod itself might be defective. Replace it with a new one.
2. RELX Essential Not Charging
Possible Causes:
- Faulty charging cable
- Dirty charging port
- Battery damage
Fix:
Step 1: Check Charging Cable and Adapter
Use a different USB cable or adapter. Sometimes the issue is not the device but the charger.
Step 2: Clean the Charging Port
Dust or lint inside the charging port can prevent proper connection.
- Use a toothpick or soft brush
- Gently remove debris
- Avoid using metal objects
Step 3: Observe LED Indicator
When plugged in, the LED light should turn on. If there is no light at all, it could mean a battery issue.
Step 4: Try a Different Power Source
Plug the device into a laptop or another wall socket to rule out power issues.
3. Weak Vapor or No Flavor
Possible Causes:
- Low battery
- Old or empty pod
- Airflow blockage
Fix:
Step 1: Charge the Device Fully
Low battery reduces vapor production. Charge it fully and try again.
Step 2: Replace the Pod
Pods don’t last forever. If the flavor is burnt or weak, it’s time to replace it.
Step 3: Check Airflow
Make sure the airflow holes are not blocked by dust or dirt.
- Inspect the bottom of the pod
- Clean gently if needed
4. Leaking Pod Issue
Leaking is one of the most common problems users face.
Possible Causes:
- Damaged pod
- Temperature changes
- Improper storage
Fix:
Step 1: Remove the Pod Immediately
If you notice leaking, remove the pod to prevent damage to the device.
Step 2: Clean the Device Interior
Use tissue or cotton to clean any liquid inside the device.
Step 3: Replace the Pod
Leaking pods are usually defective or worn out. Replace them instead of trying to fix them.
Step 4: Store Properly
Always keep your device upright. Avoid leaving it in hot environments like inside a car.
5. Device Not Detecting Pod
Possible Causes:
- Dirty connectors
- Loose pod
- Internal sensor issue
Fix:
Step 1: Clean Contact Points
This is the most effective fix.
- Remove the pod
- Clean both pod and device contacts
Step 2: Adjust the Pod Slightly
Sometimes the pod doesn’t sit properly.
- Insert it firmly
- Wiggle slightly to ensure connection
Step 3: Try Another Pod
If the device still doesn’t detect it, try a new pod.
6. LED Indicator Problems
Common LED Issues:
- No light
- Blinking light
- Light stays on
Fix:
No Light:
- Charge the device
- Check charger and cable
Blinking Light:
- Usually indicates low battery
- Charge immediately
Light Stays On:
- Remove the pod
- Restart by letting the battery drain slightly
7. Burnt Taste Issue
Causes:
- Empty pod
- Overuse
- Dry coil
Fix:
Step 1: Replace the Pod
A burnt taste usually means the pod is finished.
Step 2: Avoid Chain Vaping
Give a few seconds between puffs to let the coil absorb liquid.
8. Device Auto-Firing or Activating Without Puff
Causes:
- Moisture inside
- Sensor malfunction
Fix:
Step 1: Remove Pod and Clean
Moisture inside can trigger the sensor.
Step 2: Let It Dry
Leave the device in a dry place for a few hours.
Step 3: Avoid Humid Environments
Keep the device away from water or excessive humidity.
9. General Maintenance Tips
To prevent future issues, follow these simple maintenance tips:
- Clean the device regularly
- Avoid dropping the device
- Store in a cool, dry place
- Use original or high-quality pods
- Charge properly (don’t overcharge overnight)
10. When to Replace the Device
Sometimes, fixing is not possible. You may need to replace your RELX Essential if:
- Battery no longer holds charge
- Device doesn’t respond at all
- Internal components are damaged
In such cases, buying a new device is safer and more reliable.
Conclusion
Fixing a RELX Essential device is usually simple and doesn’t require technical skills. Most problems like no vapor, charging issues, leaking, or weak performance can be solved by cleaning the device, replacing pods, or charging properly.
The key is regular maintenance and proper usage. By keeping your device clean and using it correctly, you can avoid most common issues and enjoy a smooth vaping experience.
If you still face problems after trying all the fixes above, it’s best to consider replacing the device to ensure safety and performance.